 Salvete, good readers! What a month it has been! A wonderful summer field season has come to a close, I completed a good amount of research in the bakeries at Pompeii, and this blog has been nominated for Best Special Interest Food Blog by Saveur Magazine for the 2018 Blog Awards! Happy day! I am elated to see that so many people are interested in the archaeology of food in Roman settings and that media outlets such as Saveur Magazine, Atlas Obscura and the BBC are also becoming interested in covering the subject and shedding light on the research and the experimental archaeology that brings some of this data back to life. Thank YOU, good reader, for your part in this as well! I owe everyone a loaf of Panis Quadratus!
Speaking of panis… If you like Pompeian bread, Roman bakeries and bakery technologies, I’ve got some surprises in store for you! But in the meantime, I thought I’d try something new around here: a group project! That’s right… something we can all do together! Something simple, useful, interesting, and absolutely delicious. A short-term Roman recipe experiment that we can commence, study, refine, and then report back on in the months to come via this page and our Facebook page. Recently, I was doing some reading on Roman agriculture and flipping through some of my archived photos of Pompeian food frescoes and a recurring food item presented itself that I felt deserved some attention here on Tavola: the fig. So far we’ve covered olives, wheat, barley, grapes, pears, cheese, beans and other key ingredients in the Classical Roman diet. But we’ve neglected the glorious fig: the secondary source of sweetener in Roman foods after honey; and the fruit that kept a great civilization ‘regular’. So let’s take a few moments to briefly explore some history of the fig in the Classical Mediterranean and then let’s make a 2,000 year-old-recipe for fig vinegar… straight from the writings of Lucius Junius Moderatus Columella.

According to Dalby (2003), wild figs were a part of the human diet as far back as 8,000 BC. Originating in the Fertile Crescent, the fruit would later be cultivated to become a key part of the human diet across the Mediterranean region. Dalby also notes that sap from fig trees was often used to make fresh cheese and we know this from the writings of Columella (1st c. AD) as well. Having tried this cheese-making process ourselves at Tavola, we can attest that fig rennet does indeed separate the curd from the whey. Donahue (2015) notes that second to beekeeping and honey production, which the Romans had good knowledge of, figs also served as a sweetener for meats, fillings and desserts. Figs also produced the highest concentration of calories per unit over any other fruit in the Roman diet. Now, if you consider this statement along with Mattingly’s (1988) statement that a standard diet in Greece and Rome during the Classical period gained approximately one third of its calorie contributions from olive oil, we could surmise that, along with cereal grains, figs and olive oil represented a large percentage of the caloric contribution to the daily Roman diet.

Some of the most pristine archaeobotanical evidence of figs in the Roman archaeological record have been excavated from contexts at Pompeii and Herculaneum, in addition to other settlements and villas in the area, that were covered and sealed shut with pumice, ash and pyroclastic flow during the eruption of Mount Vesuvius in 79 AD. The nature of the eruption and the volcanic deposits during this event was such that it burnt and destroyed most of the organic material in the affected areas but some organic remains in some contexts – from wood and bone matter to bread and grain – were actually preserved due to shelter, durability or through carbonization. Figs excavated at Herculaneum, for example, maintained their shape entirely and, upon excavation, looked no different than if you or I had left them roasting in the oven too long after one too many mugs of mulsum. Similar to the 81 loaves of bread that were locked inside the oven of the Bakery of Modestus at Pompeii and then excavated in 1862, these figs were completely dehydrated and carbonized but they maintained their original form and their structure making them highly recognizable and easy to quantify.

In the Roman pictorial record, we can observe that figs were also appreciated by residents at Pompeii as they are often represented in food frescoes at the site. The fresco to the right is from the Villa di Poppea at Oplontis and conveys an idea of what varieties of flora and fauna were deemed ‘beautiful’, or worthy of recreation through art, by the villa occupants at the time. The image also portrays what is likely to be a common occurrence in domestic settings in the area when figs and other fruit were left in the sun to dry. Birds would try to eat the fruit! Pesky little rascals! The preservation of figs and fruit for later consumption was a regular practice for the Roman people. Cato (160 BC) refers to the practice of preserving fruit in De Agri Cultura, Book CXLIII, stating that a good housekeeper ‘must have a large store of dried pears, sorbs, figs, raisins, sorbs in must, preserved pears and grapes and quinces’. Columella (1st c. AD) also writes a great deal of instruction on how to preserve figs in his farming manual, De Re Rustica, Book XV: “Figs ought not to be picked when they are either too much shrivelled up or unripe, and they should be spread out in a place which is in the sunshine all day long. Stakes are fixed in the ground four feet apart and joined with poles; then on the top of these frames are placed reed canes made for the purpose, so as to be two feet from the ground, that they cannot attract the moisture which the earth generally gives out at night. On these the figs are thrown, and shepherd’s hurdles woven of straw, rushes or ferns are placed flat on the ground on both sides, so that, when the sun is setting, they may be erected and, leaning against one another, may form an arched roof, like that of a hut, and protect the shrivelling figs from the dew and at times from the rain, both of which spoil these fruits. When the figs are dry, they will have to be stored while still warm from the midday heat in wide vessels, which have been well daubed with pitch, and carefully trodden down, dried fennel, however, being strewed underneath and laid on the top of the vessels when they are full. It is well immediately to put the covers on these vessels and seal them up and place them in a very dry store-house, so that the figs may keep better.” But it is in another of Columella’s passages in the same book that we find one of the most intriguing methods of fig processing and it is through the preparation of vinegar.


So who is Columella? Lucius Junius Moderatus Columella (4 BC-70 AD) was a respected Roman farmer and a writer who, like Cato, left a great deal of information in the documentary record about early Roman-era farming, agriculture and animal husbandry. Columella was a provincial Roman, born in Hispania Baetica (Spain), who also held farm estates in Italy. While he documented information on farm-management, Columella also provided a great deal of insight into pastoral food-preparation practices through basic recipes in his writings titled De Re Rustica (65 AD).
So if you’re ready to prepare your own fig vinegar, let’s roll up our toga sleeves and get busy! A caveat: this recipe is very easy. You can read this post in its entirety, run out to the shops, and have your jars loading with figs and water in about 2 hours. Hell, your cat could probably do it for you if you want to catch the latest episode of Britannia instead… The point being, you can join us now, in this group project, or you can catch up later on in the week and still be on track. You can also start this recipe in 2019 if the impulse grabs you then. But the key to the success of this recipe is patience in watching the vinegar develop over the weeks and months to come and tending to it daily. Here’s what you’re going to need:
Columella’s Fig Vinegar
Ingredients
- Fresh, ripe, whole green or purple figs (as many as you like)
- Optional: Unpasteurized vinegar (apple cider or wine)
- A jug of tepid water
Implements
- Washed or sterilized pickling jars
- A clean cotton or linen rag
- Baking twine
Columella tells us how to make use of excess fresh figs by making them into vinegar in the following passage from ‘De Re Rustica‘:
Book XII, XVII:

“Sunt quaedam regiones, in quibus vini ideoque etiam aceti penuria est. Itaque hoc eodem tempore ficus viridis quam maturissima legenda est, utique si iam pluviae incesserunt, et propter imbres in terram decidit: quae cum sublecta est, in dolium vel in amphoras conditur, et ibi sinitur fermentari: deinde cum exacuit, et remisit liquorem, quicquid est aceti diligenter colatur, et in vasa picata bene olida diffunditur. Hoc primae notae acerrimi aceti usum praebet, nec unquam situm aut mucorem contrahit, si non humido loco positum est. Sunt qui multitudini studentes aquam ficis permisceant; et subinde maturissimas ficus recentes adiciant, et patiantur in eo iure tabescere, donec satis acris aceti sapor fiat: postea in iunceis fiscellis vel sparteis saccis percolant, liquatumque acetum infervefaciunt, dum spumam et omnem spurcitiam eximant: tum torridi salis aliquid adiciunt, quae res prohibet vermiculos aliave innasci animalia”
When translated in English, we can read the following:

“There are some regions in which wine, and therefore vinegar also, is lacking. So in the same season of the year green figs in as ripe a state as possible must be picked, especially if the rains have already come on and the figs have fallen to the ground owing to the showers. When they have been gathered, they are stored in jars or pitchers and allowed to ferment there. When they have become sour and have yielded up their moisture, whatever vinegar there is, is carefully strained and poured into sweet-smelling vessels treated with pitch. This liquid takes the place of very sharp vinegar of the first quality and is never affected by decay or mustiness as long as it is not kept in a damp place. Some people, who prefer quantity to quality, mix water with the figs and from time to time add very ripe fresh figs and allow them to dissolve in the liquid until the flavour of sufficiently sharp vinegar results; after this they let it percolate through small rush baskets or sacking made from broom and boil the clarified vinegar until they get rid of the scum and every kind of impurity. They then add a little grilled salt which prevents the production of worms or other animals in it.“
(Source: Loeb Classical Library)
Preparation
Day 1 (Sept 9)
Here is how I began my fig vinegar experiment using Columella’s instructions:
1. For this first attempt, I bought 6 small baskets of fresh organic figs (approximately 8 figs in each basket) and I used six 16 oz pickling jars. Figs are in season now (September) as they are for most of the summer. They shouldn’t be hard to find. Dried figs may also be an option if you cannot source fresh ones.
2. I have chosen to use glass jars for this first attempt at making Columella’s vinegar as I do not have ceramic dolia or amphorae at my disposal yet, as called for in Columella’s latin text. You may choose to try this in small earthenware containers and I may very well try this after this initial attempt as well. After washing each jar in hot water, dry the inside of the jars thoroughly.
3. Wash the figs gently to clean off any dirt or residue.
4. Place the figs (whole) into each jar, gently compressing them so the last fig does not pop out over the mouth of the jar.
5. Pour tepid water into each jar submerging the figs entirely in water.

6. Optional: Add a two spoonfuls of unpasteurized vinegar into the jars to kick-start each batch. Why? Because vinegars that are unpasteurized still contain the mother culture bacteria that aids in the processing of vinegar in the same way a bread starters aid in the production of good leavened bread dough. This addition to the water will kick-start the process and may also prevent the fermentation process from going off, or growing mold, before the process has picked up speed. We’ll see what happens!
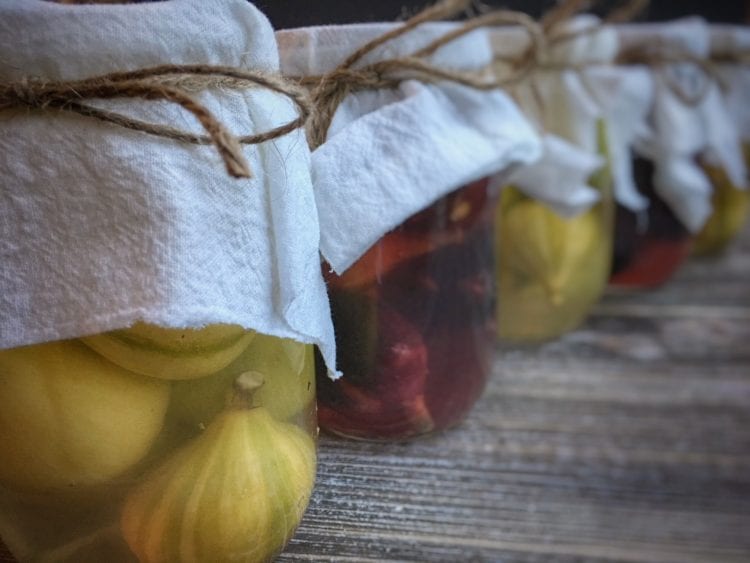
7. Cut your linen or cotton rags into squares that will will cover the mouths of the jars. The vinegar does not have to steep in an air-tight environment. The cotton cover will allow some air to get into the jars but will also keep fruit flies and other pests away from the fluid as it ferments.
8. Tie the cotton covers onto the jar mouths with twine and store them in an accessible place where you can tend to them daily.
9. Wait. Watch. Smell. Stir. Study. Strain. Keep an eye on your vinegar daily and watch for changes. I chose to use jars for this first attempt as I will be studying the colour of the fluid and watching for the figs to break down. Columella does not state to mash or slice the figs open prior to fermentation so I will prepare to crush them a bit in the fluid as they begin to break down. Eventually this will lead to straining and even boiling, if we choose to pasteurize our vinegar.
Day 8 (Sept 17)
10. I have let the jars sit in peace, untouched, for a period of week. Upon examining them today and removing the cotton covers, it was apparent that a lot of action has taken place in the past week: The fluid has turned an opaque colour and is no longer transparent; the fruit is beginning to soften in the fluid but is not ‘mushy’ yet; four jars have maintained a ‘clean’ surface; two jars have developed yeast on the surface; no pests or flies are present; and the fluid is beginning to smell ‘boozy’.


11. For the jars that presented a ‘clean’ surface (no yeast present), I examined the inside of the jar mouth for mold and took in a deep smell of the fluid to assess the health of the fermentation. It smelled fruity, a bit tart (due to the mother vinegar ‘booster’ added on Day 1), and a bit boozy! There was no mold present on the surfaces of the fluid or on the sides of the jar mouths above the fluid lines. I examined some of the figs by pulling them out of the fluid and they’re still firm, but they’re beginning to break down. I gave each jar a gentle stir and made sure that the figs were again pushed down below the fluid line. I also cleaned the mouths of each jar with a damp rag to remove any dried sugar-like residue that was likely from the ‘mother’ culture being introduced by spoon initially.
12. Two jars presented with yeast on the surface. This was interesting to see as four of the other jars did not develop yeast but two of them did. Why? Well, one of them appeared to have had all of the figs float to the top and one of the figs was literally pushed out above the fluid layer. Perhaps this gave the yeast more surface to grow on? Perhaps the figs in this jar were already over-ripe prior to fermentation? The other jar that developed yeast just did so despite the fact that fig stems and bodies were not sticking out from below the fluid layer. Perhaps they too were already over-ripe when this process began. These jars also differed from the others in another area as well. The smelled REALLY boozy. I mean, boozy like ‘old-man-on-a-park-bench-drinking-cheap-whisky-in-5-day-old-pants’ boozy. But this is a good sign! It did not smell musky or cheesy like mold… it smelled like a pub on a Friday night. Perfect. But… those yeasty beasties should come off the surface so I skimmed that layer off, slowly, with a spoon until I had most of it removed. I also removed the offending fig who tried to make a run for it. I am posting a photo of the yeast development below for identification. If you see green, black, pink, white fuzz, mossy looking tufts, or black spots on your batches, it’s game over. Or… you can also try to remove the mold carefully and press on. As a precaution, I marked the jars that presented with yeast with a large black question mark so I can watch their development closely and know that these were the two jars that were more active than the rest. I then tied the cotton covers back onto the jars and placed them back in their resting place.

13. From here, I will check the fluid daily and watch for yeast developing again. As the figs get softer, I will break them open a bit to let some of the flesh and sugars inside ferment as well. What’s in store next? Who knows! Well, I guess Columella knows but he’s not here to inform us so we’ll just have to keep going!
Day 30 (Oct 9)
14. So these little darlings have been quietly fermenting away and I ran off and left town for a few weeks and decided to let nature do my work for me. Nature did some work, alright, some good and some bad! I’m a bit angry at my old buddy Columella right now… When I arrived home, I checked on my six jars of vinegar with excitement and curiosity. Four of them were in terrific shape and two of them decided to go the way of the devil. Oh well. I have learned a few lessons (outlined below) and have decided to press on with the fermenting process with the four good jars for another two weeks to make it an even 6-week process. Here’s the steps that I completed on Day 30:
15. I removed the cotton from the tops of the jars and inspected the liquid carefully. I advise that you use a flashlight if your eyes aren’t great so you can inspect for mold. It’s a good lesson to learn to be able to identify mold in all of its forms and colours. You cannot be too careful with this type of experiment so you want to make sure that you protect yourself and your family from harm if anything goes a bit ‘off’ with the batch. I found two jars that went ‘off’ and I am presenting them to you (with shame) below. For science. This is mold. If you see anything like this on the tops of your ferments, throw it out. Lesson? Do not let the tops of the fruit stick out above the liquid line. Use a weight or use an airtight container. Also, here’s a fun (and gross) gallery of mold/not mold on fermenting kombucha to help you train your eye: https://www.kombuchakamp.com/kombucha-mold-information-and-pictures

16. I immediately threw out the two bad jars with mold in the ferment. With the four good jars, I had a nice long smell of them and they smelled lovely, floral, boozy and vinegar-y (is that an adjective?). Anyway, the four good jars presented with a top that was scummy, with a thin film, some bubbles, and a generally unremarkable appearance. No mold was present like the other two jars so I decided to strain the brine, break the fruit, and go for another two weeks of fermenting in clean jars.

17. I strained each jar using cheese-cloth (4-ply) and cut each fig open with a pair of kitchen scissors to allow for the insides to become a part of the ferment a bit easier. I also placed the figs and the strained brine in new, clean jars and topped up the liquid with water up to the middle of the neck of the jar. I will be checking these remaining jars regularly in the next two weeks to see if they maintain their integrity.

18. After straining, breaking the fruit, changing the jars, and topping up with water, I tied fresh cotton cloths to the top of the jars and placed them back in the cool pantry. Here are my thoughts right now: Next time I will use an airtight container, despite many people making vinegar successfully using an open-air method. I want to see the difference. I’m going to be keeping a close watch on the remaining 4 jars to see if they make it to 6 weeks. I will also use larger containers, more liquid and less fruit next time to prevent exposure above the liquid surface line. I may also pasteurize this batch afterwards. We shall see how this final stage goes!

Day 50 (Oct 29)

19. On the 50th day, I returned to check the jars and was pleased to find that nothing ‘heinous’ had happened to these four good jars, no mold had developed, it smelled healthy, so it was time to strain and contain my finished product.
20. I strained each jar using cheese-cloth and filtered the finished vinegar into new, clean jars. This took some time as the cheese-cloth created a fine filtering process that strained out a lot of sediment and surface scum. Following this final straining process, I did some further reading on canning and fermenting precautions to educate myself on food safety when doing my own canning and fermenting. There are some precautions that everyone should take especially when you are fermenting or canning low-acidic foods and not using a salt or vinegar brine. This process also was not an air-tight process so anything sitting above the surface of the liquid was subject to mold, etc. Use caution when canning and fermenting always and educate yourselves on the procedures and the risks rather than take any chances. When in doubt, throw it out.

21. A note on botulism. Throughout this initial process, I had a lengthy conversation about home canning/fermenting with a tomato sauce producer that I know and we discussed the risk of botulism. You should educate yourself on this topic as well. Here are two very good sources of info to begin with: The Need-to-Know Guide to Botulism, For Safe Canning & Preserving and Many Cases of Botulism are Preventable (CDC). I read into this thoroughly as this first-time ferment for me made me a teensy bit cautious as I had not conducted an experiment like this before. I was cautious and threw away any jars that developed anything on it that looked remotely like mold but botulism does not present any visual cues and can also be present in foods without presenting an off-putting odour or flavour. But here’s the positive note: Botulism does not develop in an acidic environment and fruit is usually too acidic to allow botulism to grow. This recipe also used an initial dose of mother culture vinegar in each jar which created an acidic environment from the start. I believe that this recipe will be safe from botulism. I am, however, choosing to pasteurize the vinegar as a first-time precaution. Pasteurization does not kill botulism but it will kill other bacteria such as E. Coli or Salmonella. I don’t want to take any chances with this first batch so I am choosing to pasteurize after I leave my jars of vinegar to rest and steep for another few months. I suggest that you do the same if you decide to try this process as well. The steeping jars have been marked appropriately and are resting in the fridge, off-limits to all of my family members until I pasteurize them. If you choose to make this at home without an air-lock or an airtight environment, I also suggest that you a) Use the initial dose of vinegar to create an acidic environment in the ferment; and b) pasteurize the vinegar afterwards. Instructions on how to pasteurize home-made vinegar can be found below:

22. Pasteurizing your vinegar: Place vinegar in a pot with a thermometer and bring it to 170-185 degrees Fahrenheit. Leave the vinegar to heat for 30 minutes. Let vinegar cool and then strain it one to time to remove foam or scum from the boiling process. Let the vinegar cool and then contain it in new, sanitized (boiled) jars for storing. Seal the jars and refrigerate the vinegar going forward.
23. Lastly, I plan on tasting this vinegar once I have deemed it safe to do so, after the pasteurization process. I also plan on reducing some of the vinegar to see if it will make a nice reduction for use on meat, salads and desserts. I will report back again with those results in the near future!
If you wish to follow along with this group project and make fig vinegar with me and my old buddy Columella, please keep us posted as your vinegar progresses by posting your photos and observations in the comments form below or by starting a conversation over at the Tavola Mediterranea Facebook page.
This vinegar recipe experiment began on 09-September-2018 and ended on 29-October-2018.


I am trying to save this recipe to make it in the future. I am being blocked from doing so. could you email me a copy of the recipe I can save in a recipe file? Thanks. I’ve never heard of a recipe blog that blocks people from saving recipes?
Hi Bryan, I have no idea why this is happening but will correct it. Thanks for letting me know! Farrell
Thank you, this looks great. I would love to try it but before i do, Can you share the outcome ? And did you end up making a reduction? How much did you reduce it and how did that come out? Did pasteurized the vinegar affect the taste ? Thank you !
This sounds delicious – I’m definitely going to give it a try in a few weeks!
Hi! Do let me know if you do. Post pics and share your experience with it over on the Facebook page at: https://www.facebook.com/tavolamed/ Good luck! – Farrell