
Good day, good readers! Summer is drawing to a close, the days are slowly getting cooler, and the season of sweaters is just around the corner! While it brings tears to my eyes to say goodbye to Italy for another summer well spent… there’s something wonderful awaiting us in the months to come: Olive harvest season! That’s right, folks! We’re going to tackle the mighty olive and we’re going to start with this recipe below brought to us by none other than the Republican agriculturalist known as Marcus Porcius Cato. This article is part of an ongoing series called ‘The Mediterranean Triad’ and it highlights foods and recipes in the Roman diet that incorporate the three most valued agricultural resources during Classical Antiquity: Grapes, Grains and Olives.
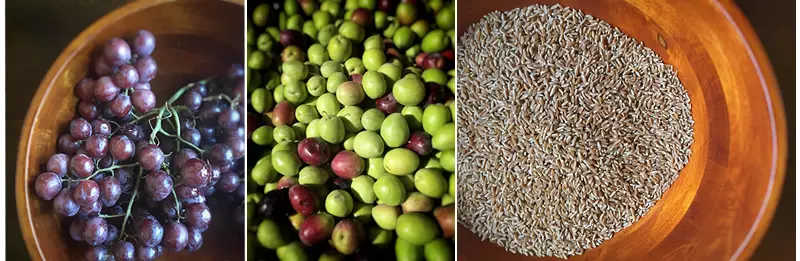
‘The Mediterranean Triad’ is a term used to describe the three most prominent crops in the Classical Mediterranean diet: Grapes, Grains and Olives. These crops were central to the Roman diet in that they were versatile and commonly used components of Roman food preparation, cooking and medicine. Grapes were consumed as fruit, wine and sauces; grains were consumed as breads, cakes, porridges and digestive aids; and olives were conserved and consumed as fruit or used for many other daily purposes in the form of oil.

We can see the Mediterranean Triad and its central nature to the Roman diet as it is represented frequently in the Roman archaeological record: Archaeobotanical evidence such as olive pits, grape seeds and whole grains; technological evidence such as quern-stones (grain mills), olive and grape presses, and ovens or hearths; and pictorial evidence such as frescoes or reliefs. Other key archaeological artefacts that demonstrate how much grape, grain and olive products were being stored and transported throughout the Empire are ceramic transport amphorae.
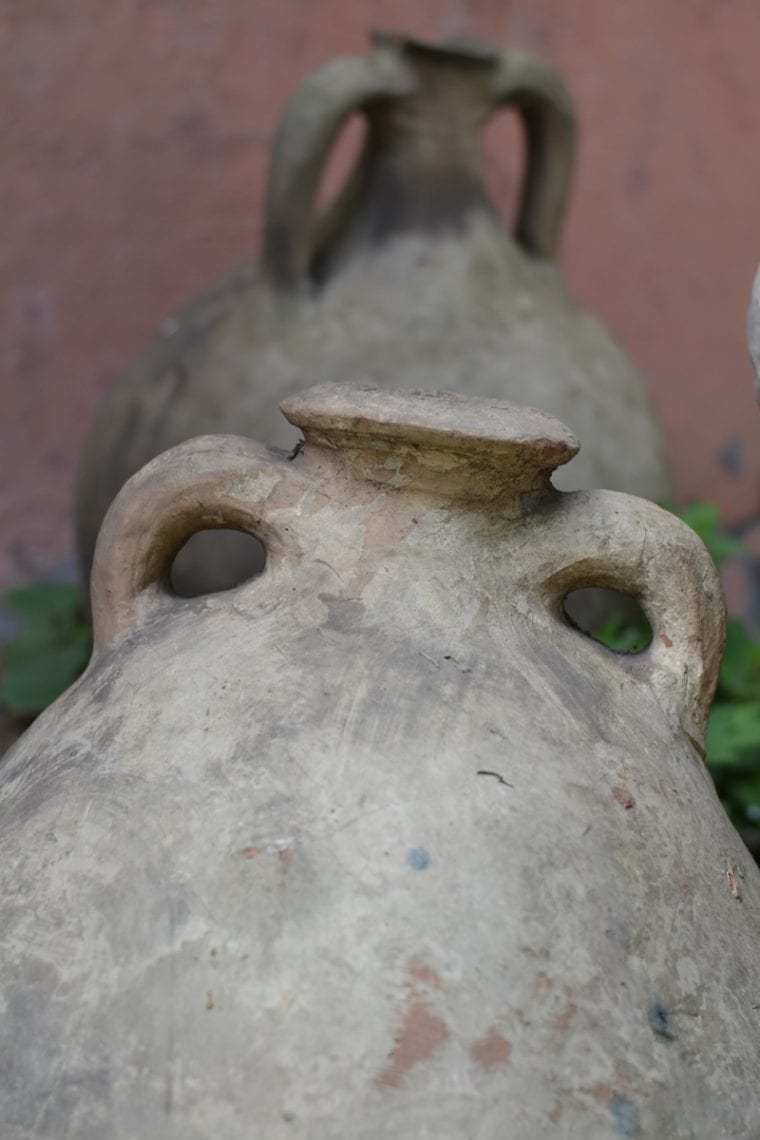
Amphorae sherds, often dubbed ‘the archaeological garbage of the Mediterranean’, can be found in abundance in archaeological contexts throughout areas that were once Roman territories. These vessels were in use as food transport containers for a period of approximately 1,000 years. The word ‘amphora’ is derived from the Greek word ‘amphoreus’ or ‘amphiphoreus’ and is described as a two-handled ceramic vessel that is meant to contain foodstuffs. The Greeks adopted the utilitarian shipping vessel design from the Phoenicians and Egyptians and began manufacturing their own versions of transport amphorae from the 7th century BC forward. From there we see amphorae begin to reach the Greek colonies in southern Italy from the 4th century BC onwards. We begin to see transport amphorae disappear from the archaeological record altogether in Late Antiquity.
What makes amphorae an invaluable source of food-trade data in Roman archaeological studies is that they provide us with insight into volume and product origin. It would be impossible for archaeologists to discern how many olive products, for example, were transported into the city of Rome from provincial producers if we could only rely on long decomposed organic evidence. But when we have millions of ancient ceramic transport amphorae sherds, scattered throughout the former Roman territories, we have a much broader picture of the volume of foodstuffs that were being imported and consumed by Romans during the Republican and Imperial periods.

So let’s take a look now at olives and their presence in the Roman diet. Olives were first cultivated 7,000 years ago in the eastern Mediterranean and Levantine region. Evidence of this cultivation has been found in the archaeological and early documentary records in the Levant (modern-day Israel, Jordan, Lebanon, Syria and Iraq). Olives were one of the first commercial products to be grown and traded in the eastern Mediterranean during the Bronze Age. Greek and Roman farmers valued the olive so much that they attributed its origin to the Gods. Columella called the olive tree the ‘queen of all trees’ and this assertion was supported by the many uses that olives had in Greek and Roman daily life.
Olives were consumed as fruit, but only after conserving them in brine or vinegar, but it was the oil that this fruit produced that was the most useful to the Roman people. Olive oil was used in food preparation, cooking, and conservation. One of the earliest Roman cookbooks, ‘Apicius‘, records over 30 recipes that incorporate olive oil. In fact, David Mattingly (1988) points out that a standard diet in Greece and Rome during the Classical period gained approximately one third of its calorie contributions from olive oil. The Romans used olive oil for medicinal purposes as well when treating cuts and burns, hemorrhoids, and other skin afflictions. Olive oil was also used as a cleansing agent when bathing and an anointing liquid during rituals or special occasions. In addition to these many uses, olive oil was also used as fuel in oil lamps to create light so that the Roman people could work and walk about long after dark.

One of the best places to begin exploring the archaeology of olives or olive products in the Classical Mediterranean is Monte Testaccio in Rome. The archaeological site, which is located in Testaccio in Rome (Italy), is a 2,000-year-old man-made hill that is comprised entirely of broken olive oil amphorae. This ‘ceramic landfill’ is a testament to the staggering amount of olive oil that was brought into the city of Rome from the 1st to the 3rd centuries AD. The hill itself is approximately 36 metres in height with a perimeter of 1,490 metres and presents an overall volume comprised of 580,000 m3 of ceramic amphorae sherds. The amphorae collection at Monte Testaccio is the largest remnant of a once bustling olive oil distribution system depicting imports from Hispania Baetica to Rome through the annonae urbis and militaris; the food doles for the Roman people and its military. The hill still stands to this day and has been an active archaeological site, under the auspices of the Comune di Roma and CEIPAC (University of Barcelona) for over 30 years. It is possible to see portions of the hill and its structural make up when walking through Testaccio en route to the New Testaccio Market or the Protestant Cemetery.

If we want to explore some literary representations of the olive during Classical Antiquity, it is always best to turn to the documentary record. Cato the Elder provides us with several recipes on how to prepare and conserve olives in his Republican-era farming manual ‘De Agricultura’ (circa 160 BC). One of the most interesting recipes that he presents is for a very basic olive brining technique that, I feel, is a perfect place to start for anyone who is interested in learning how to process olives and how to safely can them. I use the word ‘safely’ because food safety is necessary during this process and short-cuts cannot be taken as the integrity of the brine and olives depend on it. And I use the word ‘can’ because I have not had custom amphorae and dolia made yet so I am using jars for this first attempt at this process as I suspect that its the method most of you will be able to use as well. Essentially, to begin with, this will be a lesson in brining and curing… But when those dolia are ready, watch out! We’ll be preserving and sealing everything in earthenware containers, like our old friend Cato, in no time at all.
A caveat before we begin: This isn’t just an olive brining recipe; its a project. This process is going to take approximately six months from start the finish but the bulk of the work will happen in the first two weeks. If you do not have freshly harvested (raw, unbrined, uncured) olives nearby you can source them by googling olive growers that sell uncured olives in your country or in regions nearby when they are in season. When I googled it, many options came up in the USA alone so it should not be difficult to source. You may even be able to find a place to pick olives yourselves which would make the experience even more involved and exciting. You’ll want to start looking around for olives in late summer or autumn as they will begin to ripen on the branch during this time.
So if you’re ready to brine some olives, let’s roll up our toga sleeves and fetch some fresh water from the stream…. Here’s what you’re going to need:
Cato’s Olives in Brine
Ingredients
- 10 lbs (or more) of freshly harvested olives
- 3 lbs of coarse salt (Morton’s Coarse Kosher Salt, for example)
- Vinegar (white or red wine, or table)
- 1 egg
- A large bottle of olive oil
- Ice (optional)
- Any of the following items to flavour the brine: fennel seeds, dried oregano, garlic, dill, anise.
Implements
- Several large Rubbermaid buckets or Tupperware containers with lids
- Enough canning jars (and lids) to accommodate the amount of olives you’re processing
- Cooking tongs/pinchers
- A large pot or canning pot (water-bath pot) with a removable rack
- Clean tea towels
- Rubber oven mitts or gripping gloves

Before we start the brining project, let’s have a read-through of Cato’s recipe. Cato provides us with the following instructions for preserving olives in brine:
From: De Agricultura, CXVII:
“Oleae albae quo modo condiantur. Antequam nigrae fiant, contundantur et in aquam deiciantur. Crebro aquam mutet. Deinde, ubi satis maceratae erunt, exprimat et in acetum coiciat et oleum addat, salis selibram in modium olearum. Feniculum et lentiscum seorsum condat in acetum. Si una admiscere voles, cito utito.1 In orculam calcato. Manibus siccis, cum uti voles, sumito“.
From this we can translate the following:
“To season green olives: Bruise the olives before they become black and throw them into water. Change the water often, and when they are well soaked press out and throw into vinegar; add oil, and a half pound of salt to the modius of olives. Make a dressing of fennel and mastic steeped in vinegar, using a separate vessel. If you wish to mix them together they must be served at once. Press them out into an earthenware vessel and take them out with dry hands when you wish to serve them.“
(Source: Loeb Classical Library)
Here are the steps that I took to brine my olives:
1.Rinse the olives and remove any that are soft to the touch or badly bruised or damaged. Remove stems and leaves.
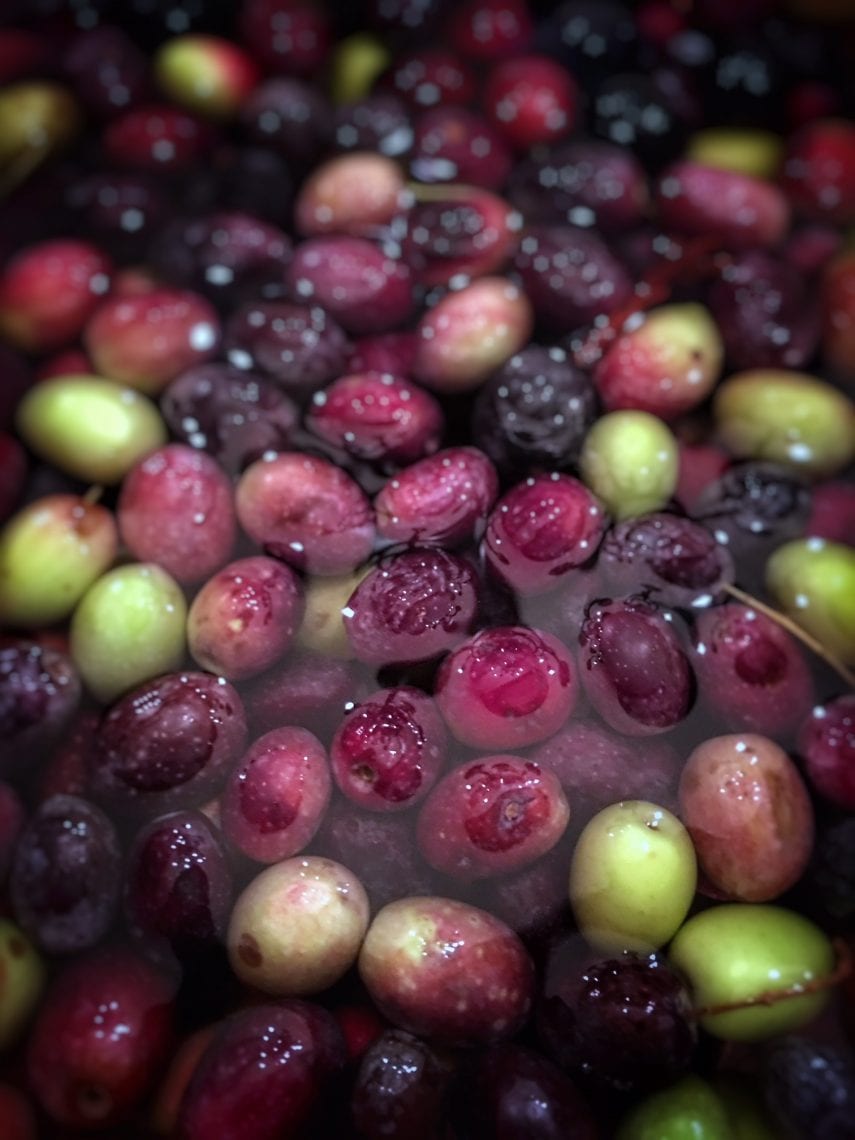
2. Soak the olives for 13 days. This process slowly removes the bitterness from the olives prior to the brining process. Note: the water needs to be changed nightly in order to pour off the bitterness and keep the olives from going bad. Try to keep the olives submerged in the water under a plate and keep the buckets covered and in a cool place. You can add some ice into the fresh water nightly if you live in a warmer climate and need assistance in keeping the water cool.
3. After the 13th day, it’s time to make a brine and can our olives. You’re going to need a full day for this so do it on a weekend or a free day. You may also wish to engage an assistant. It’s easier to have someone assist with the jars when it comes to filling them, closing them, and working with boiling water in the process.
4. Fill a large pot or a water-bath canning pot with water (two thirds full) and bring it to a gentle boil.

5. Open all of your jars and remove the lids and lid-inserts. Once the water is boiling you’ll want to submerge the jars in the water for 10 minutes, batch by batch, to sterilize the jars. Once they’ve been sterlized, put on oven mitts and remove the jars with tongs and let them sit to cool on a tea towel beside the stove. Keep the water on a rolling boil.
6. To begin the canning process, let’s make a basic brine. Cato tells us that we need half a (Roman) pound of salt for a modius of olives. That’s 329 grams of salt in an 8.7 litre container of olives submerged in water. I was working with a much higher volume of olives from my own property, so I decided to submerge all of my olives in fresh water on the day of canning and then slowly remove all of them into another temporary container so I knew exactly how much brine I needed to work with to submerge the olives in the jars. From here I salinated my brine. This section of the project is the first exciting turning-point in the process as it involves science, or what most of our grandmothers would simply call ‘common knowledge in the kitchen’. In order to make a brine that is strong enough to cure the olives, but also stave off decomposition and the growth of bacteria, it has to have enough salt content. One of the easiest and most traditional ways of testing adequate salination of brine is to place an egg into the bottom of the brine pot. As we slowly add the salt into the water and dissolve it, you’ll begin to notice that the egg will lift off of the bottom of the pot-base and begin to float towards the surface of the water. The egg becomes more buoyant as the water reaches adequate salination. This is because the water has become denser with salt so the egg is now able to float to the surface. Once the egg reaches the surface of the water, you have an adequately salinated brine.

7. Once the brine is adequately salinated, begin to flavour the brine with vinegar. You want to aim for a flavour that is quite salty, tart and tangy. Add vinegar into the brine, bit by bit, until you’ve reached a flavour that is almost as salty as it is tart and tangy with vinegar.

8. Prepare your herbs and other additives, such as garlic and oregano, in a bowl and place it next to the stove-top. The canning begins now!
9. Set up a system on your counter beside the stove-top that allows you to complete your steps as you move towards the boiling water. For example. Bowl of olives, jars, herbs and garlic, lids, pot of hot water. On the other side of the pot, or on the floor in a safe place, place another tea towel to rest the jars on as they come out of the water after the sealing process.
10. Begin canning each jar like so: Using a spoon, gently fill a sterilized jar with olives almost to the top of the neck of the jar. Sprinkle selected herbs or additives on top of the olives. Using a ladle, add brine into the jar until it reaches the top of the neck and covers the olives. Top the olives and herbs with a splash of olive oil. Using rubber gloves or rubber oven mitts, tighten the jar of the lid securely (with the insert) onto the jar mouth and place it into the low-boiling water for 15 minutes. You can place the jars in the water in batches or one by one. It’s imperative that the jars stay submerged in the water for 15 minutes as this will extract all of the air inside the jar creating an airtight environment that, along with the salt, will also promote a bacteria-free, sterile environment inside the jar during the curing period.
11. Complete this step with all of the jars but be cautious not to touch the inside of the jar with your fingers or bare hands and stay alert while working around the boiling water. I find that having a partner during this process helps. If one person fills the jars, the other can tighten and submerge them.

12. As you remove each jar from the water, place them onto a tea towel and let them cool overnight. This, good readers, is when the second exciting turning-point takes places, or what I like to call ‘The Night of the Knuckle-Crackers’. This particular brand of horror manifests itself it random pops and snaps echoing throughout the house during the night, hour after hour, as the jars start to cool and a vacuum is created inside the jar that pulls the seal button shut on the lid insert. I advise sleeping with the bedroom door shut or wearing ear-plugs during the night to prevent midnight leaps from the bed thinking a knuckle-cracking intruder has made his way into your kitchen.
13. The following morning, once the jars have cooled and the knuckle-cracking intruder has departed, place all of the jars into a pantry or a cool place for 6 months of rest. That’s right, these olives will cure for 6 months or more until they’re ready to consume. This is where patience comes in and you’ll have to turn your focus elsewhere for a while. I’m sure that old Cato occupied himself just fine with writing or making libum while he was waiting on his olives to cure.
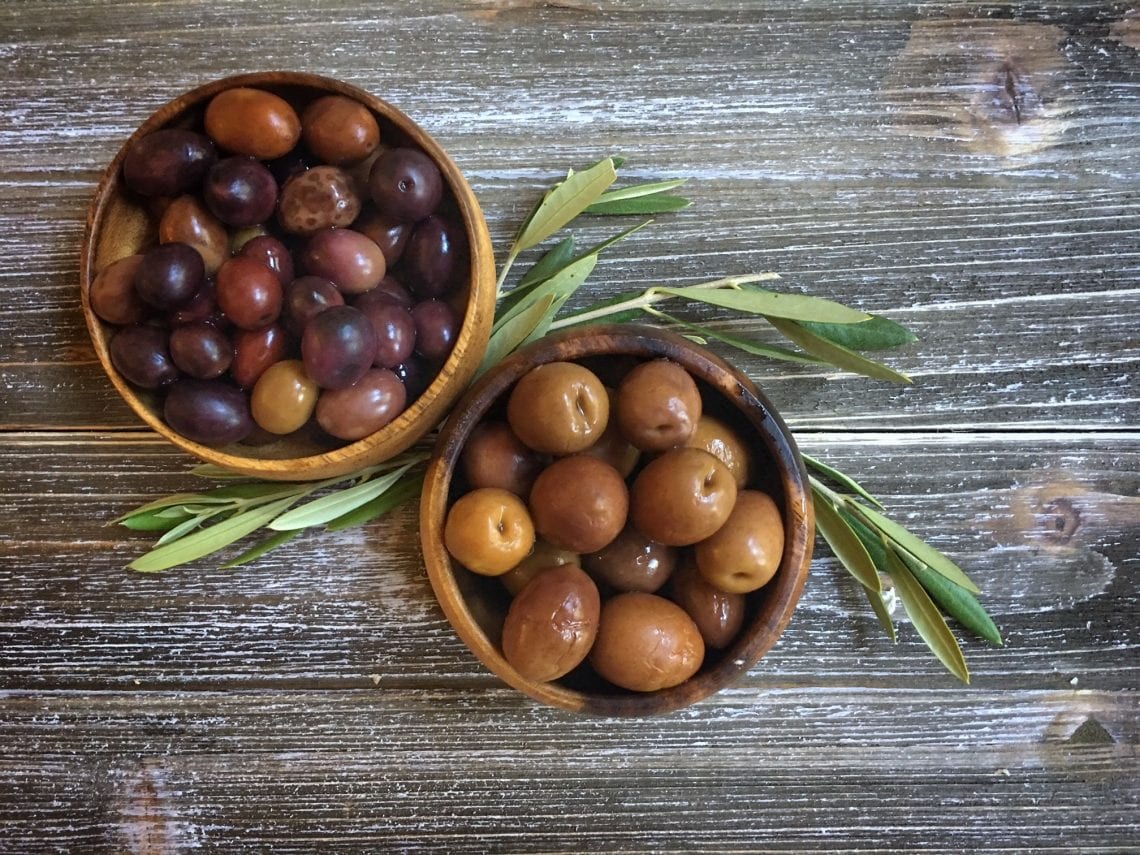
14. In Spring of the following year, take a jar from your storage area and taste-test one of the olives. Is it still bitter? If so, leave the rest of the jars to cure again for another month. Once the olives have lost most of their bitterness, and the flavour of the brine and additives are dominant, you’re ready to serve! You may also choose to marinate the olives but that’s a post for another day…
The batch of olives photographed in this post were processed in the autumn of 2017. They were opened again in June of 2018 and had the most original, pleasing and interesting flavour. It was nothing like you’d buy in the store or at your neighborhood deli; rather it featured hints of the natural olive tartness co-mingled with the salt and vinegar of the brine. There was a slight lingering bitterness that was very pleasant to the taste and the texture of the olive was soft, tender and pleasant. The flesh of the olive maintained its integrity very well throughout the brining process and did not break down or become ‘mushy’. One of the recurring thoughts that I encountered while tasting the fully cured olives was that this simple salt and vinegar brine didn’t do much to mask the flavour of the olive but it did everything to preserve the fruit itself. It has often been claimed that Romans had a tongue for bitterness, that they enjoyed the tart flavours of wines, vinegars, and bitter herbs such as rue. If this claim is in fact valid, which I have found it to be from time and time while cooking Roman recipes, then these olives also support that claim. Bitterness is most definitely a key part of the Roman flavour profile but not to the point that it becomes unpalatable. It’s there to tempt and tease the palate, to wake it up and call the tongue and throat to attention… and these olives do exactly this. I was very pleased by the natural ‘organic’ flavour of the fruit and the simplicity of the brine that allowed the flavour of the olive itself to be a bit more ‘centre-stage’ than we’re used to with commercially produced olives in the modern era.
Feel free to leave comments or suggestions about this article using the comment form below. Did you try this recipe? If so, feel free to join the discussion and post photos on Tavola’s Facebook page.


I was quizzing a Cretan agricultural worker about brining olives, starting with sea water and how much salt to add. After some thought he said, “until the egg swims”. Right he was