We all need to understand one basic thing in life: there’s no need to ever buy bread from the shops when you know how to make your own. It’s very easy to make a nice loaf of bread and it should never cost you more than $1 when you add up all the basic contents that go into a nice, simple loaf. There’s also no need to pay $5 or more for a loaf of so-called artisanal bread from your local market when you can learn how to make an even better loaf at home… and you don’t need that $300 bread machine either!
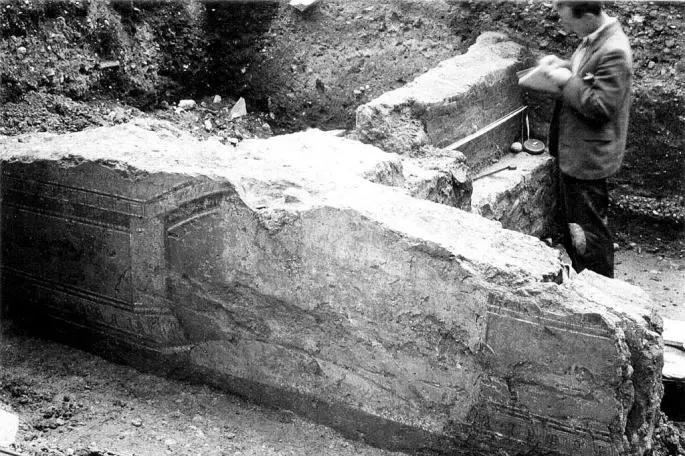
First, a bit of history: Wheat has been a staple in the human diet for over 10,000 years and evidence of wheat cultivation can be dated back to 9,000 BC in the Levant or what is now known as Iraq. Prior to this wild wheat, emmer and barley were used to make primitive breads. It was when early hunter/gatherers learned to grind wheat and other cereal grains that our love of bread was born. Originating in the Levant (or the regions now known as Syria, Jordan and Israel) and in the Nile Delta, wild emmer was the first cereal grain to be domesticated. Being a coarser and heavier grain, it would have produced a very filling and unleavened loaf in it’s time. As farming of wheat continued throughout history preferred strains would be favoured and cultivated eventually leading to what it is we bake with today. Grain mills, such as the one pictured below (Ostia, Italy) have been found by archaeologists scattered across the Mediterranean. They were used to mill maize and coarse grains used for cakes and breads.

The use of yeast and leavening agents in bread-making was something that came along much further in the evolution of bread. Pliny The Elder documented in 77 AD that barbarians in Iberia and Gaul were skimming off the foam from beer to use it in creating a lighter loaf of bread, he also noted that leavening agents first being used in Roman breads coincided with the conquering of Macedonia for the Empire in the 2nd century BC. The Romans thus adopted leavening agents in making their own breads as well. It is believed that fermented dough starters were in use as early 4,000 BC in Egypt and the practice moved north and east from there.
So let’s get to the recipe, shall we?
Italian Country Bread made with Starter (Pasta Madre)
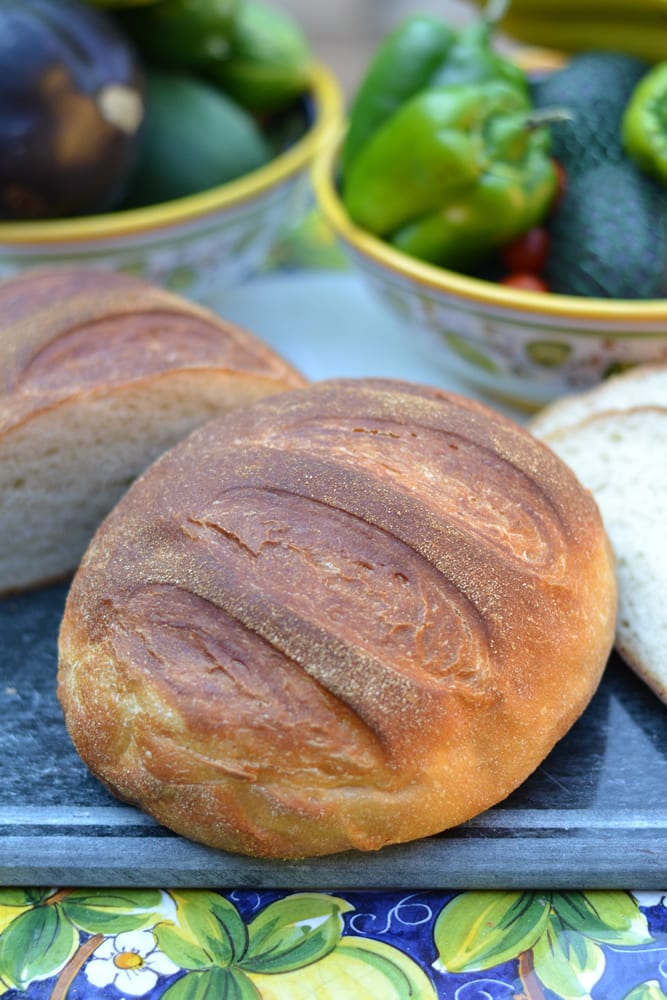
When I first started making sourdough bread I went through a series of experimental recipes for weeks and weeks trying to find the best way to make a perfect loaf. I spent a few weeks going through the ‘no knead’ bread recipes found online by Mark Bittman and Jim Lahey, and some kneaded methods like Paul Hollywood’s and Jamie Oliver’s recipes. While I found the methods they all used to be truly fascinating, the end result for me was always a loaf that fell flat after the second rise while trying to flop it into the preheated cast-iron french oven. It happened every… single… time. So! I ended up stepping away from it for a spell and then coming back to the table with my own method. It’s a bit involved but it produces absolutely wonderful results: a firm chewy crust, a soft bubbly interior and nice tangy flavour.
This recipe uses a starter, or pasta madre, as its sole leavening agent; no conventional bakers yeast (cakes or granules) is required. If you’ve got your own sourdough starter, you’re good to go. If you’d like to make your own that you can use for years to come there’s a terrific recipe for Sourdough Starter (Biga or Lievito Madre) here on Tavola. The other items this recipe calls for is parchment paper and a lidded cast-iron casserole dish. Any brand will do; I use Le Creuset french ovens like the one pictured below.
To start the ball rolling we need to make the sponge, or the poolish. This is where you take some starter, or biga/pasta madre, and use it to grow a seperate starter specifically for use in making one batch of loaves. The reserve is then fed and remains in the fridge for future use. Some recipes call for starter added directly into the recipe, some call for a poolish (sponge) to be made beforehand. Given that the bread preparation takes approximately 7 hours from start to finish, you may want to make the poolish the night before you bake so it can do its work overnight.
Poolish (Sponge)
- 1/2 cup of starter
- 3/4 cup water
- 1+1/2 cup of flour
Combine and stir the starter, water and flour together to form a nice, sticky wad of dough. Cover the container and leave it sit for an 8 hour period until it’s inflated, bubbly and fluffy. It should amount to approximately 2 cups of poolish once it is ready. Note: I like to feed my starter at the same time after I have removed some for the poolish. They can both sit out and inflate together. After the 8 hour period, the poolish will be used in the recipe and the starter will go back in the fridge.
Bread Dough
- Poolish (approximately 2 cups)
- 5 tbsp of milk
- 1 cup + 3 tbsp of tepid water
- 2 tbsp olive oil
- 3+3/4cups of flour
- 1 tbsp salt
- 1 tbsp sugar
- 1/4 cup of semolina or corn flour
Using a mixer, or good old-fashioned hands, combine and mix all of the ingredients in a large mixing bowl. I like to add in the flour last so the wet ingredients can commingle a bit and dissolve the salt and sugar first. Fold and mix the dough until you have a nice ball of dough. Cover it and let is rise for 3 hours.
After the first rise is complete, take the dough out of the bowl and cut it into 2 halves. Dust a cutting board or a clean counter top with plenty of semolina or corn flour. Lightly punch the first dough half down on the semolina and begin pulling the edges over into the centre. Essentially you want to pull the top, bottom, left and right sizes over into the centre of the loaf to stretch the gluten strands a bit and prepare it for the second rise. Once you’ve folded the edges over into the centre, you will have a visible seam. Line a mixing bowl with parchment paper and place the dough in the bowl with the seam on the bottom. Score the top of the loaf with cooking scissors or a knife and cover the bowl with plastic wrap or a clean tea-towel. Let the dough rise for another 3 hours. Repeat this process with the remaining other half of the bread dough.
 While the dough is rising a second time, you’ll want to preheat the cast-iron pot(s) one hour before you bake the loaves. If you have two pots, bake the loaves at the same time. If you only have one pot, the loaves can go in one after the other. After 2 hours of the second rise hads passed, preheat the oven to 450F, 230C or Gas Mark 8 and place the pot(s) inside the oven, empty and lidded, for one hour. Once the loaves have risen again at the 3 hour mark, and the pot(s) are piping hot, carefully remove the pot(s) from the oven and place the loaves on parchment paper to the pot by lifting the edges of the paper and gently placing it into the pot. Place the lid back on and bake each loaf for 30 minutes. Note: Be careful not to go over as the loaves will start to brown around the 25 minute mark.
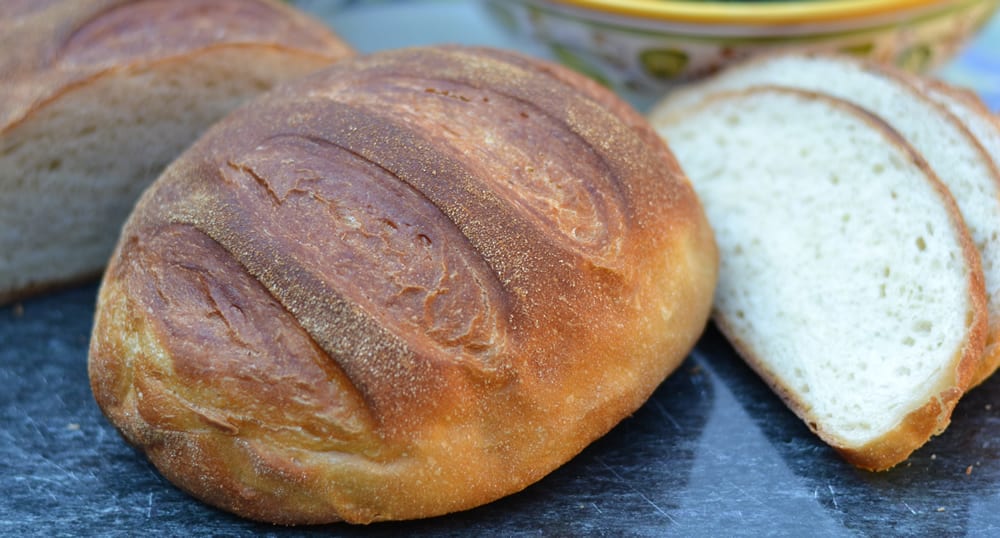
After 30 minutes, remove the loaves and let them cool on a rack for a few hours. These loaves will pull free of the parchment paper with ease after cooling. Rather than slather a slice with butter, I’m going to challenge non-Italians to try this bread first with a bit of olive oil. You’d be amazed how flavourful this can be!
Buon Appetito! Good eating to you…
Please feel free to leave comments or suggestions about this recipe below.


Hello,
I have made your bread recipe a few times… still learning as I am not consistant with my outcomes, it’s still always good.
When you ask us to measure the flour do you suggest an ordinary 4 cup measuring cup? I am never sure if i shake to get the right measurment that its not too commpacted which would be too much flour maybe Can you advise me please :}
Yes, but flours are different weights and textures and courseness etc so don’t stress out about that too much. Just keep experimenting! You’ll find your way. – Farrell
When I made this, the dough rose so high that the crust got stuck to the lid of the dutch oven LOL. I will use a bigger one in future…but the bread tasted perfect. I will try with a percentage of whole grain flour next time too. Very nice recipe and directions.